I thought I make take a little time here and post exactly what the steps are for making a painted spindle. The process is much more involved and time consuming than most people may think.
First I take basic stock dowels and wooden wheels. The dowels come in sections that have to be cut into 11" lengths for standard spindles. I cut these on a chop saw and then use a fine grinder to take off the edges of the dowels. Next I sand them with three different grits of sandpaper to get them silky smooth. After this, the one end must be drilled to accomodate the hook. I don't own a drill press, so this is all done by hand with your standard cordless drill. Now the dowels go into the freezer! More about that later.
Next the wooden whorls have to be hand sanded. Many of them are very rough and need multiple sandings. I start with a large grit sand paper and wet the whorls after the first sanding to bring up more grain. After they have dried, they are sanded again. This process is repeated until I get a smooth surface. Many times, this is a matter of sanding, wetting, drying and sanding up to 5 times. Now a notch is hand filed on the edge of the whorl with a metal file. Finally, the whorl is sanded with a very fine grit sandpaper and then a sealant coat is painted over it.
Now the whorls are ready for base coats of paint. I pick a background color and cover the top of the whorl or the entire whorl, depending on the design. Lighter colors can take up to 4 coats of paint to get a good finish. Darker colors usually only require two coats. The whorls are each sanded lightly between coats of paint.
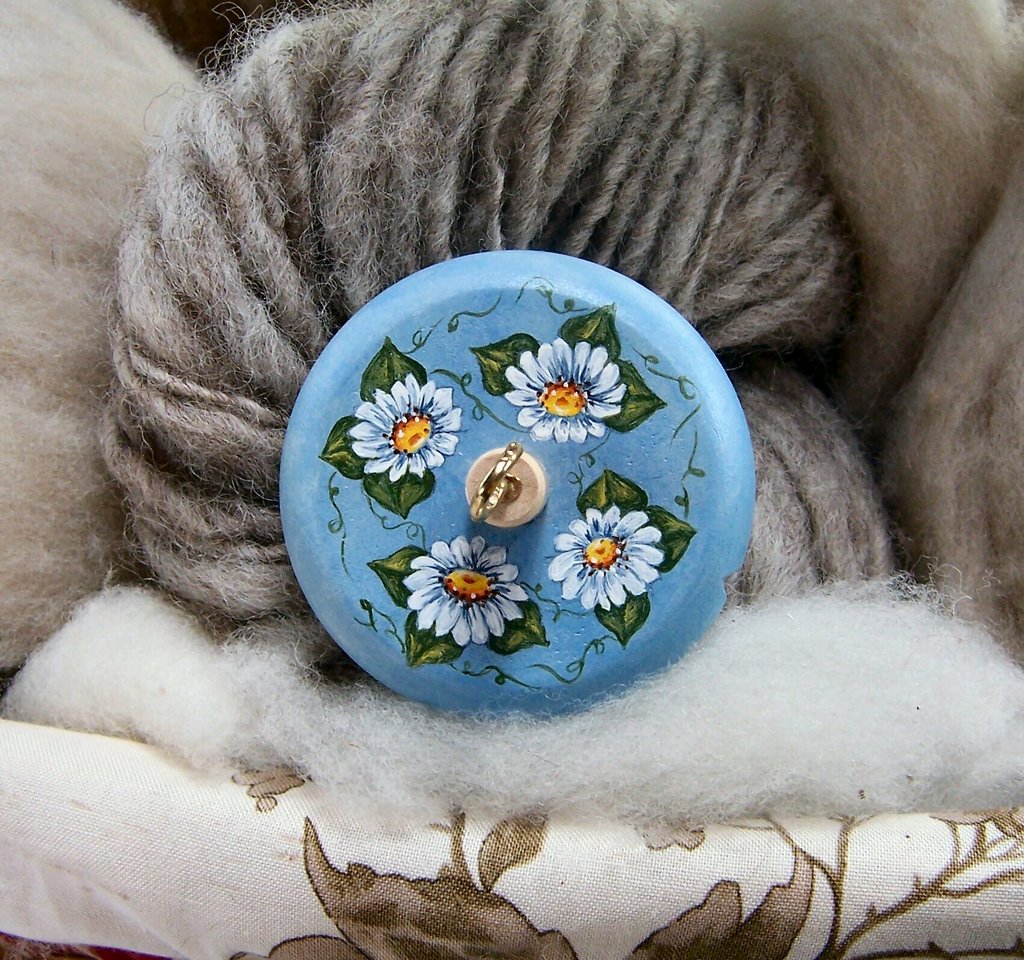
It's finally time to paint the design on the whorl. Most of the time, I just pick up a brush and rough in the design and start painting. With more complex designs, I may draw the artwork on a piece of paper first and then tranfser it with graphite to the whorl so that I know it's going to come out with correct proportions. Painting a whorl can take up to 2 hours of solid work but most are around an hour each.
Once the whorl is finished, it gets 2-3 coats of a sealant spray on both sides. Now it's time to assemble the spindle.
Okay, remember the dowels are in the freezer. I do this so that they shrink ever so slightly and will fit snugly in the hole of the whorl. Due to this method, no glue is necessary. When I take a dowel out of the freezer, I have to work quickly before it warms up. I do one at a time and coat the top end with a bit of paraffin first to facilitate getting it through the hole in the whorl. Sometimes it's really difficult to get the dowel through and it needs to be tapped in with a wooden mallet so that it seats far enough from the whorl.
Finally, the hook is inserted into the dowel and I give the spindle a trial spin to make sure that it is well balanced and that there is nothing that needs correcting.
I take pictures of every spindle I make and keep a file of these. I also send out pictures to customers before they pay for their spindle so that they can approve the artwork. So far, I have had not had a single spindle turned down but if someone doesn't like their spindle, I expect them to say so and I will re-do it to meet their expectations.
Last but not least, the spindle is wrapped in tissue, packaged and sent off via USPS to its new owner.
Needless to say, I typically get around 2-3 spindles done per day. Some days I can only get one finished if the design is particularly complex.
Peace & Joy,
Jen
No comments:
Post a Comment